Saturday, February 11, 2012

The Dream Tub!

Last time when I posted all the photos of my "dream home" I posted this beautiful bathroom photo, with the following disclaimer; "Now, granted, my bathroom does NOT have a beautiful claw foot tub, or a window, but I'm going for this feeling. Vintage farmhouse."

Well, my wonderful husband saw that and said, "We could make it work. If we lay all of the wood flooring ourselves, we could afford a new tub." What a guy! So I started looking for a claw foot tub. I was a little disillusioned to find that they start at about $800, and go up... a lot from there. Once again Dan came to the rescue. He saw an add on Craig's List for a claw foot in out area for $275! I checked it out right away. And here's what I found:
I fell in love at first sight! The problem? The tub was 67" long. Our bathroom is only 59 1/2" long! Super Dan to the rescue again! "I can make it work! We'll put in recessed walls and shelving on both sides of the tub and it will be great!" Well, he's always been able to make it work before, so I said, "Great!"
Following are a few photos of his Herculean effort to make my claw foot bathtub dream come true!
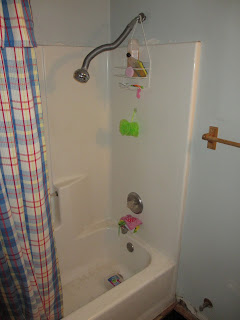
Bathtub before
Out with the old!
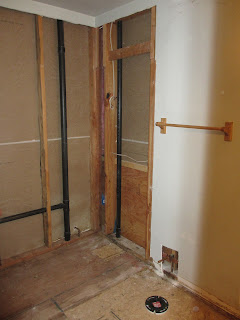
Down to the studs... then removing those! We need every bit of space between the drywall on our bedroom to the drywall in our kitchen to make the tub fit!
Yes, this is a lot of work, but when we got the tub home, and tried it on for size... we knew it would all be worth it!
Besides making room for the tub, Dan and my daughter Lilly also made space for a recessed faux window. The bathroom is in the center of the house and therefore has no windows, and a bit of a closed in feeling. We thought we would fake some exterior light.
Our first test of the window lights! Fun!
Here is a photo of the bead board backing that will be at the head and foot of the tub. You can also see the new rough, whitewashed cedar siding. LOVE IT!

We are getting closer! There has been great advances on the rest of the house too. I'll post more soon. We are getting pretty worn out after a month of this though. We are ready to be done, but that is a ways down the line still. We just keep thinking of how wonderful it will all be when its done, and how relaxing life will be when the house is put back together.

"But if we hope for what is still unseen by us,
we wait for it with patience and composure."

Well, for the most part!
But, I think we are at least learning patience and composure through this process!

Until next time,
Tina


Monday, January 23, 2012

Dreaming....

Well, at the moment in our house there is a 4' x 4' hole in the bathroom floor, a 3' x 6' hole in the kitchen wall, a section of the wall in the girls' room missing, plywood flooring.... well, you get the idea. However, I can visualize what I want it all to look like when it's done. Dan and I have been doing some dreaming, and looking for inspirational photos, and here's what we have found so far.

KITCHEN
Beautiful dark counter tops in my kitchen!
Or...
Maybe we go white on white?
Both options look good with the red kitchen.

BATHROOM
Now, granted, my bathroom does NOT have a beautiful claw foot tub, or a window, but I'm going for this feeling. Vintage farmhouse.

GIRLS' BEDROOM
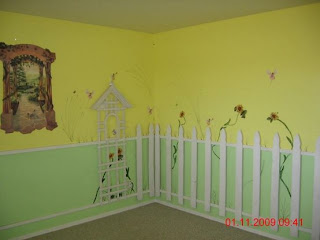
A picket fence wall. And before I even saw this photo, I had purchased yellow and green paint!
Twin Murphy beds with a cabinet (similar to this one) between them. Ours, however, will be white enamel to go with the fencing.

HALLWAY
Crisp, clean, white enamel beadboard in the hall. The wall above will be a darkish yellow as it is in the living room currently. I also want to paint all of our picture frames white and then do a bit of antiquing on them. Nice!

Dreaming is fun, and it gives us something to hold on to during this "not so fun" stage of our unplanned remodel. We'll have to see how far we get with the funds we have available, and how close we come to our imaginings.

Here is my own take on Genesis 1:2 as it relates to our project:

The house was without flooring and void of any furnishings, and chaos was over the everything. And the Spirit of God was hovering over the house.

- Lord, I pray that when this project is done, you will say "It is good!"        

Tina 


Sunday, January 15, 2012

Unexpected Remodel

We woke up Sunday morning a couple weeks ago to a bit of a disaster at our house. Our water heater supply line had failed, and as a result, we had a minor flood. I say minor because the we were able to sop up the surface water with a few towels. However, the damage was bad. The more Dan and I tore into the area, the more damage we found.
 Subflooring was mush and had to be removed.
The padding under our laminate floor was D R I P P I N G wet!
Drywall was wet up 2 ft in some areas.
The laminate flooring we loving laid just 2 years ago was swelling and warping.

We knew we were in way over our heads!
So, we called our insurance company, and then Belfor Property Restoration.
The Belfor trucks showed up Monday morning.
They tore up all the flooring around the flooded area and then started probing for moisture content. The rod that they are putting into the holes drilled in the cabinets in the above picture beeps every time water is detected. I started calling it the "Evil Beeper Thing" because it would not shut up!! It beeped at everything!! Meaning, of course, there was a lot of water.
At the end of day 2, the house had been well torn apart.

So here we are, on day... hmm, I guess its been 12 days since the "flood." We are living in a vacation rental (thank you Traveler's Insurance Co) because the house has been gutted, and is STILL drying out! So, what are we going to do? Well, we've decided that while the house is torn apart we should try to get as many projects finished as possible! So the "wish list" is as follows:
Entire House
new flooring
paint ceilings
Kitchen
new countertops
replace kitchen door
paint touch-up
Living Room
replace glass in front door
patch and repaint walls
Front Bathroom
new flooring
refinish vanity
new countertops
paint (wainscoting?)
shower curtain
rugs
Hall
paint
wainscoting
Girls' Room
build murphy beds
paint
curtains
rugs
Back Bathroom
new vinyl flooring
add storage shelves
Master Bedroom
paint

Ok, I'm exhausted just thinking about all of this! So far we have done most of the demolition work, but WOW! And my poor husband only has weekends to work on this project. Well, this is a WISH list. We'll see how far we actually get. Wish us luck! And your prayers are appreciated! :o)

Tina
“With man this is impossible, but with God all things are possible.”
 Matthew 19:26


Friday, January 6, 2012

Dreaming of Spring!

Yes, I know that winter has only just begun, but I am getting that spring feeling... Christmas is over, and it's time for spring! Well, at least in my mind! Here in Central Oregon it will be many months before spring actually "springs"! Until then, I will dream, browse my own garden photos from last summer, and those of other garden lovers. If you too are dreaming of spring, send me a note to let me know I'm not alone! Include a picture of your garden! I'm hungry for green!!
Herbs and impatiens keep my little German hiker company all summer.
My backyard fountain is home to colorful flowers and vintage bake ware.
I can't wait for warmer weather to see the clematis I planted last year overtake my mailbox! Hope the mailman doesn't mind.

Think green thoughts as the winter weather howls! "To every thing there is a season" as it says in Ecclesiastes chapter 3. For now its a time of rest and waiting.

Have a great January!
Tina

Friday, December 30, 2011

Raspberry Experimentation...


Quick and Easy Sweet Raspberry Biscuits
1 tube refrigerator biscuits (can use low fat)
1/3 C frozen raspberries
1 T + 1 t sugar (I used Splenda)
1/8 t cinnamon
Cinnamon sugar to sprinkle over the top

1. Preheat oven to 400 degrees.
2. Line cookie sheet with parchment paper.
3. Mix raspberries, sugar and cinnamon in a small bowl, set aside.
4. Roll out each biscuit into an oblong circle.
5.Add 1 heaping teaspoon of raspberry filling.
6. Fold biscuit in 1/2 and seal edges with prongs of a fork.
7. Place on cookie sheet lined with parchment paper.
8. Spray tops with cooking spray and sprinkle generously with cinnamon sugar.
9. Bake for 13 minutes.
10. Remove from oven and spread about 1/2 t. cream cheese frosting on each pastry.

Makes 10 pastries.
I even froze the leftovers to use as toaster-oven pastries for hurried mornings!

How this recipe came about:
I found a wonderful looking raspberry sweet roll that made my mouth water this morning. As I looked at the recipe ingredients, I had all of them, but ..... boy did kneading, rising bla bla bla... look like a lot of work. So, my clever lazy side kicked in and I was determined to find an easier way to make a mouthwatering raspberry sweet roll.

I took 10 oz of frozen raspberries, and added 1/4 cup of  sugar (I used Splenda), and about 1/4 teaspoon of cinnamon. (This made enough for about 30 pastries!)

Now for the difficult part... the dough. Wait! I had a roll of refrigerator biscuits that I didn't know what to do with! Perfect!!
 
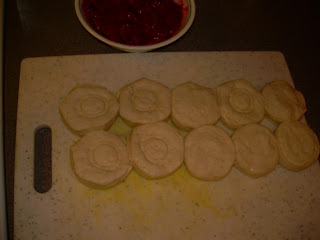
Since I had rolled sweet rolls in my head, I put the 10 rolls together to make one long section of dough,
then pinched all of the ends together.
I added half of the raspberry mix, and then ended up scooping 2-3 T off as I rolled it up!
I sliced the dough log into 10 sections and placed on a cookie sheet lined with parchment paper. I gave them one final generous sprinkling of cinnamon sugar.
I baked them at 400 degrees for 13 minutes, added a very small dab of cream cheese frosting and....
Hmmm... my "pinching" job didn't hold too well. 
However, the rolls were wonderful!!
YUM. Not too sweet, not too tart. Just right!
Easy, and mouthwatering, just what I was going for!

 You can see the results of my second attempt in the first photo! Much nicer looking in my opinion. There you have it. My morning of experimentation! My family seemed to like the results as well.

Have you ever experimented with a recipe with great results? Or maybe your results were more humorous than tasty? I'd love to hear your stories!

Have a Happy Last Friday of 2011!
Tina


Tuesday, December 20, 2011

Twine Christmas Stars

I was browsing through Pinterest this morning looking for a last minute gift, and ran across the following pin:
"Cool" I thought to myself. However, when I dug a little further, I noted that these twine stars were for sale, and I was not able to find a pattern when I "Googled" it. (BTW, if you would like to purchase these stars you can find them here.) Being so cheap, broke, crafty, I decided to come up with a homemade twine star. I found a pattern for a 5 pointed star that I thought would work, and set out to rework it to use with twine. Here's what I came up with:

STAR
Hook Size: I used 3 different hooks to make the different size stars. H, K and N.

Using twine, chain 5; join with slip to form ring. (You'll want to keep your stitches loose)
Round 1: Ch 1, work 10 sc in ring, join with slip to first sc—10 sc.
Round 2: * Ch 6, skip next sc, slip st in next sc; repeat from * 4 times, join with a slip st in base of beginning ch-6—five ch-6 spaces.
Round 3: Ch 1, work [3 sc (4 for larger hooks), ch 5 (3 for larger hooks), 3 (4) sc] in each ch- 6 space, join with slip to first sc—five ch-5 corner spaces.  Slip Stitch in next 5 sc to reach the top of the star point. In top sc, 1sc, stretching the loop to make a hanger:
 Tie loop to twine's tail to fasten off and form hanger:
Leave a tail when you cut the twine, and weave it in (I used a #4, 2mm hook because I found a yarn needle was nearly impossible to use).

At this point, to keep the star flat, I wet them down and stretched them into the desired shapes, then left them to dry.
You could place a heavy book on top, but since I need to give these as gifts tonight, I want to be sure they dry quickly. I added some dollar store rusty bells to complete the country feel.

Not bad! While they are not quite as "perfect" as my original inspiration photo, I was able to complete all 3 stars in about 45 minutes. So with a time investment of only 15 minutes each (plus a couple minutes for the bells) this makes very quick, really cute country ornaments!


Happy crocheting! And have a wonderful week before Christmas!
Tina

And the angel said unto them, "Fear not!
  Behold I bring you good tidings of great joy
which will be to all people,
Unto you is born this day
a Saviour which is Christ the Lord."
Luke 2:11

Monday, December 19, 2011

Repurposed Potting Bench

What?? We're talking about a gardener's potting bench the week before Christmas? I know its crazy, but it was 18 degrees here this morning, and somehow I am dreaming of spring. Not a good sign since spring doesn't hit the high desert until about May in Central Oregon! That's nearly 6 months from now! OUCH! Well, I'll just dream for a few minutes. You're welcome to join me in my dream!
This is my wonderful new potting bench! My husband built this bench for me from a very old packing crate that we carted home from a friend's yard (saving it from the burn pile) several years ago. It has been taking up space stored in the back yard since then, and we were not sure what to do with it until last summer! We added some scrap wood we had around the house, an old, unwanted mirror from my daughter's room, and a sink we purchased for $5 at the local Habitat for Humanity ReStore! (If you have a local ReStore, I highly recommend going! LOTS of wonderful stuff at great prices, and your money goes to a great cause!)
My DH, Dan, started out by reinforcing the box. Years of exposure to the elements meant that the poor box was a little weak, but it also meant it was weathered in a very attractive way! The addition of 2x4's and wood glue added strength to our base. At this point Dan removed the front panel from the box. This was eventually split in two pieces making the doors which transformed our box into a cabinet.
We stood the shell back upright, and DH added the 4x4 posts to the back that would hold the mirror and shelves across the back. Dan decided to add fresh deck boards to the top of the box since it will see a lot of down and dirty potting soil action in the future. This also made a nice solid counter to put our sink in. We coated the boards with Thompson's Water Seal to protect them from water damage.

From here, you will have to use your imagination because there are no more "in progress" pictures. We had all 4 of our granddaughters at the house at the time (ages 6, 5, and our two 2 year olds), so we were... slightly distracted! 

Dan cut the hole in the counter top, dropped in the sink, mounted the mirror and additional backing boards, and bingo! (Well, actually this is a major oversimplification of this project, but since I was only slightly involved, I don't have all the details. I was building a pallet table for our back yard at the time. Maybe I'll write about that project sometime in the future.)
We still need to "plumb" and drain the sink, and add shelves to the inside, but the frame work is complete, and sitting out in the cold waiting for warmer days! I will add more, (and better) photos when we complete the project this spring.

Thanks for letting me veer from the Holiday Season for a few minutes this morning! I feel better already!

Have a great day!!

Tina